Building a Gamestate with Zenject in Unity - Sun, Jul 23, 2023
Single Source of Truth and Inversion of Control
Unity provides countless mechanisms by which one can shoot themself in the foot. It’s a common and popular entrypoint to picking up C# for newcomers to the language. However, there’s a common gotcha individuals will quickly begin to encounter as they familiarize themselves with the basics of the language via Unity’s MonoBehavior classes.
Unfortunately this comes with a common and harsh pitfall: by default, Unity really encourages individuals to produce countless individual batches of code that they tightly couple to their game objects, which results in sooner than usual confronting the big bad wolf that is the Byzantine Generals Problem.
For those not in the know, the crux of the issue is the fact that by breaking up their game state into numerous individual “shards”, where every individual entity in their game has its own pool of statefulness, it produces a very easy pile of spaghetti one can find themself tripping and falling into.
Eventually you find yourself naturally wanting to sort the mess out and unify all this logic. Rather than countless individual objects having little pieces of the game state pie, you wonder to yourself, “Is there a better way?”. Is there perhaps some easier, cleaner way I can bring all the game state into one single place, one single source of truth, and everything else orbits around it?
Well, there absolutely is, and in fact there are countless ways to do it. In this post I will go over the solution I came up with that takes a bit of inspiration from a few other common forms of C# projects.
Centralizing the Engine through Dependency Injection
To begin we will need to do a bit of legwork. I am a massive proponent of Dependency Injection and I strongly encourage folks to get familiar with it. Unity has a fairly popular Dependency Injection library called Zenject that we will be using today. However keep in mind it is not the only option, nor is it even potentially the best! I’m merely using it in this example because it is popular and the first result on the unity asset store. Also, it’s free.
For the purpose of this project we will start things off by creating a new 2d core project, and installing the latest Zenject unity package which you can download from here: https://github.com/modesttree/Zenject/releases/latest
We will need to do some initial bootstrapping of the project to get all the basics working. Let’s start by bootstrapping up the DI Engine.
-
Add a folder named
Scriptsinside of our Assets folder -
Inside of the scripts folder, create a new Mono Installer and name it
StartupInstaller(Right Click > Create > Zenject > Mono Installer) -
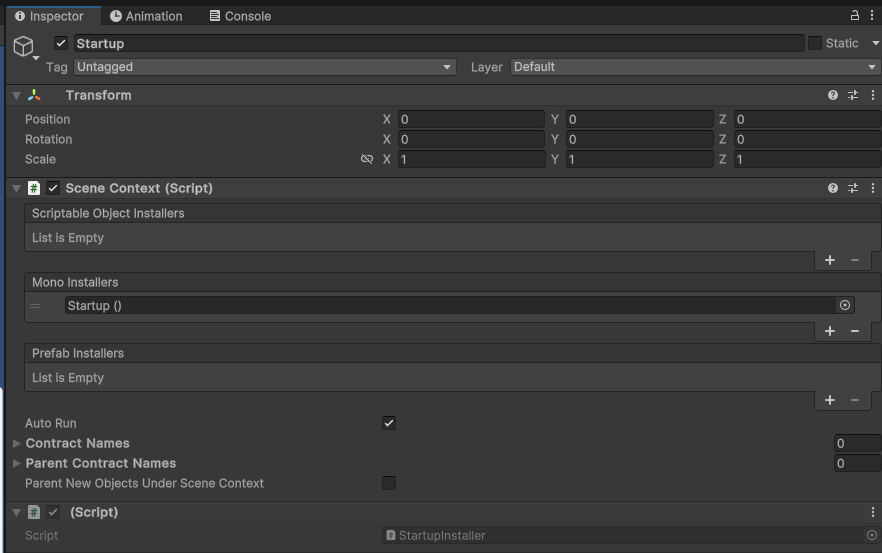
Add a Zenject Scene Context to the root of the project and name is
Startup(Right Click Scene > Zenject > Scene Context) -
Drag and Drop the
StartupInstallerscript onto ourStartupto add it as a component. -
Drag the
Startup Installerscript component up to theMono Installerslist in theScene Contextcomponent. (You may need to hit the + button, and you can just drag and drop the wholeStartupobject onto the field if you like, Unity will figure it out)
Your Startup object should now look like this:

And your StartupInstaller script like so:
|
|
This is now the bare bones basic of registering for Dependency Injection, lets now move on to:
Utility Files
Let’s put together a few pieces to demonstrate the Game State system in action. To Begin with, we need a couple cs files that provide handy utility for the purpose of this project. You can download and save them to the following path (you’ll need to make the folder for it): Assets/Scripts/Utilities
PropertyWatcherBase.cs
This file has a very handy base class that implements the INotifyPropertyChanged event, which is going to be the key lynchpin used to apply Single Source of Truth logistics to our project. Our Game State class we make later will make heavy use of this class.
I currently have it hosted up as a gist on my github, you can feel free to check it out. It has a bunch of utility classes and methods that culminate in the functionality needed for this project. You can use them as you wish!
Source code: here
Raw Download: here
You can just Right Click -> Save as… the second link, and it should work.
There are multiple important methods on this base class, let’s dig into how they work. To begin with, the class implements the event delegate PropertyChanged to exist, which is our Pub/Sub model that our services can publish and subscribe to. This will be our main mechanism for how we inform services that changes have occurred to the Game state.
The first method, Mutate, is our “writer” that will automatically invoke the aforementioned event when we write changes. I’ll show how we hook that up to Full Properties on an implementing class in a moment below.
The second method, BindChild is a handy tool to let us nest PropertyWatcherBase models, so we can have children of the parent GameState (and further nested down, grandchildren and etc), this method will listen to a child’s event and append the parent’s name to it in the form of Parent.Child, which gives it a unique signature.
The third exposed method, BindTo, is a handy method subscribers utilize to subscribe to a given event. We will show how to use this farther down.
The fourth method, OpenTransaction is a bit more advanced and won’t be covered by this tutorial, but you can see examples of how to utilize it on my gist comment here:
Building our GameState
Alright, time to show it in action! Create a new script file, let’s call it GameState.cs to keep it simple, and put it in the folder Assets/Scripts/PropertyWatchers. Lets also make a second file called ChildGameState.cs and put it in that folder too.
Both will inherit from PropertyWatcherBase<TSelf>, where TSelf is the class itself (this needs to be done for some internal code specific reasons, we wont dig into the details here).
We also want to put a full property on the child, let’s make it an int and just call it Counter with the backing field _counter.
The parent GameState class will get its own full property, let’s make that one a ChildGameState called Child, backed by the field _child
Next, we utilize the Mutate method on Counter’s Set method to hook in the event, and BindChild on Child’s setter (in GameState) to bubble the event up. We can keep Child’s setter private, because though we want the properties of our classes to be mutable, we don’t want the classes themselves to be.
Since we are utilizing a Dependency Injection Engine, we will want to do Constructor Injection to hand GameState its copy of the ChildGameState
You’re two files should now roughly look like this:
|
|
Now let’s finish up by registering these classes in our StartupInstaller as singletons.
StartupInstaller.cs:
|
|
Basic Project Setup
With our DI Engine up and running, Game State built, let’s do the basic legwork to make a scene that we can actually interact with now!
To start, lets add a Canvas + EventSystem to our scene (Scene Right Click > UI > Canvas)
On the Canvas we will want to modify Render Mode to Screen Space - Camera and drag and drop our camera onto the Render Camera field. Then we will want to set UI Scale Mode to Scale With Screen Size and set Screen Match Mode to Match Width or Height, then finally set Match to 0.5 (slider dead in the middle)
This will make our UI work smoothly regardless of what resolution the game runs at.
Next up lets add a Vertical Layout Group component to the canvas, so we can split it in half. Check Control Child Size to both True and True for Width and Height respectively. Do the same for Child Force Expand
Add a Text (TextMeshPro)(UI > Text - TextMeshPro) (to the Canvas as a child (this will cause a TMP Importer prompt to appear, click Import TMP Essentials, this is very important), as well as a Button (UI > Button - TextMeshPro)
If all went well, your button and text box should equally fill the Canvas up 50/50, with the text at the top and button at the bottom. If the order is reversed its not a big deal, but if you wanna fix that just change the order the two are as children of the Canvas object.
To finish off, modify the Text (TMP)’s Main Settings fields to make the text easier to read. You prolly will want to modify Font Size, and set Alignment to Center + Middle to make it dead center.
You can also do the same for the Text (TMP) child of the Button to make it’s text bigger and easier to read, if you like.
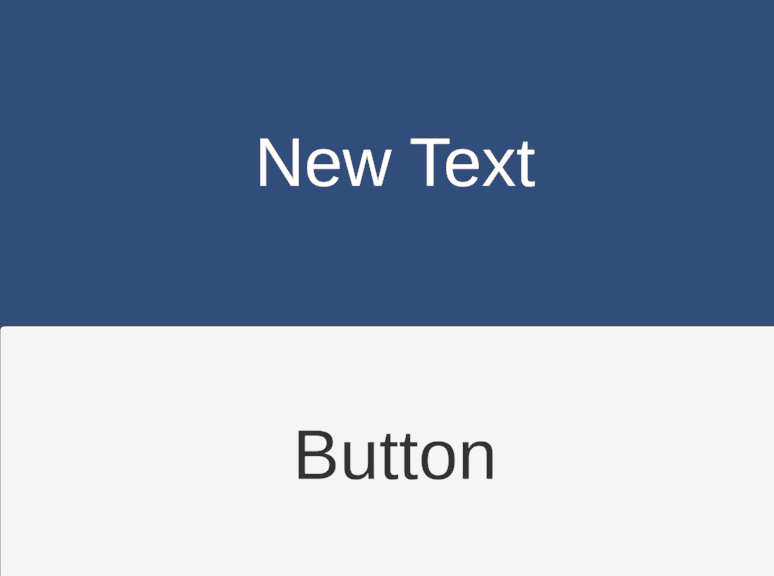
Theoretically you should have something that sort of looks like this when you run your game:

Clicking the button doesnt do anything yet, but let’s start wiring up our services!
Event pushing a MonoBehavior
Now, theoretically we could directly try and access the GameState from any given MonoBehavior, but that is the way to spaghetti land. Instead, we want to utilize Inversion of Control to keep all of our MonoBehavior objects as incredibly simple, lightweight, and “glass box” as possible. For all intents and purposes, each of our MonoBehavior scripts should have no concept of any other MonoBehaviors,nor the Game state or engine or anything else. They should purely have two things they do:
-
Expose methods to manipulate their own fields, like transform, sprites, text, etc.
-
Expose agnostic “This thing happened” events that can be subscribed to by the GameEngine and any of its descendants.
To distinguish these “simple” MonoBehavior’s, I like to refer to them as Entities, as they represent actual “things” in the scene. Objects, Sprites, Text, Buttons, etc etc.
Let’s create two of these as an example, with the TextMeshPro we made on the top being a prime example of #1, and the Button we made as an example of #2.
Start off by adding a new script component to both the Text (TMP) game object (the big one, not the one inside the button), and name it TextEntity. We will also add a new on to the Button and call it ButtonEntity
Make sure both of these end up in Assets/Scripts/Entities, to stay organized.
TextEntity needs a serialized TMP_Text field, let’s call it Text, as well as a public method called SetText that takes in a string and assigns the value of it to Text.text
ButtonEntity needs a public event called Clicked (of untyped EventHandler), and a method called OnClick that null coalesce invokes it (as per typical event style). If you’d like to read up on C# event delegates, check this link out!
Your two MonoBehaviors should now look like this:
|
|
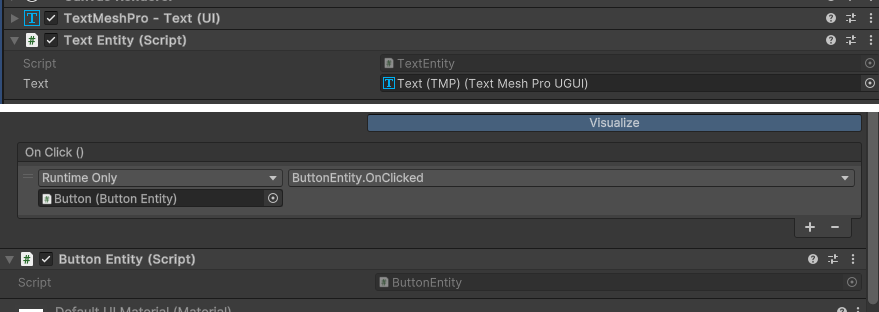
Finally we just need to wire these two up in the editor. For the Text (TMP) we just repeat our same trick as before and drag and drop itself onto the Text field that should now show up for the Text Entity component on it.
For the Button, we want to hit the + button on its On Click () list in the Button component, then drag and drop the Button Entity component just below onto its Object field, and select ButtonEntity > OnClicked() for the Function dropdown (which currently says No Function)
Your Text (TMP) and Button should now look like these, respectively:

Finally, let’s register both of these on our Dependency Injection Engine, to make sure we can inject references to them for the next step. Our StartupInstaller will want them as Field References, ideally.
|
|
IMPORTANT! Don’t forget to drag and drop the TMP Pro and the Button onto the two new fields we added to Startup’s StartupInstaller component!
We are now prepared to wire our Scene up to our GameEngine!
Binding the UI to the Engine and GameState
To start, let’s make ourselves a Service to delegate out the task of handling these UI objects. Services will be what we refer to individual “modules” of our stack, and they should be POCOs (Plain ole classes), not MonoBehaviors. They can be injected into each other (but try and avoid circular dependency loops!), and make up the majority of our dependency tree.
Largely speaking, nearly all of your code should be inside of various Services, and they should act as your way of sorting out your code to different areas that make sense.
Let’s make a folder for these, at Assets/Scripts/Services, and make our first service in there. Lets call it EntityService, and it will have the job of managing our Entities.
We will want to inject the GameState, TextEntity, and ButtonEntity into it via Constructor Injection (which is as simple as just using it as a param in the public constructor)
Next, we can have this service wired up to handle delegation of mutating the Text Entity, and listening for the Button entity’s click event. At the core of it, the EntityService serves the role of delegating information back and forth between Game State <-> Entities. This isn’t completely mandatory as you could just inject the Game State directly into the Entities, but in actual practice there likely would be much more complicated logic than what we have here, and the service should act as the space to put all that logic to keep it compartmentalized off.
We will implement Zenjects IInitializable interface to declare this as a “root” service that has initial startup logic to begin running.
You should end up with something a bit like this:
|
|
And we once again register it as a single on our StartupInstaller:
|
|
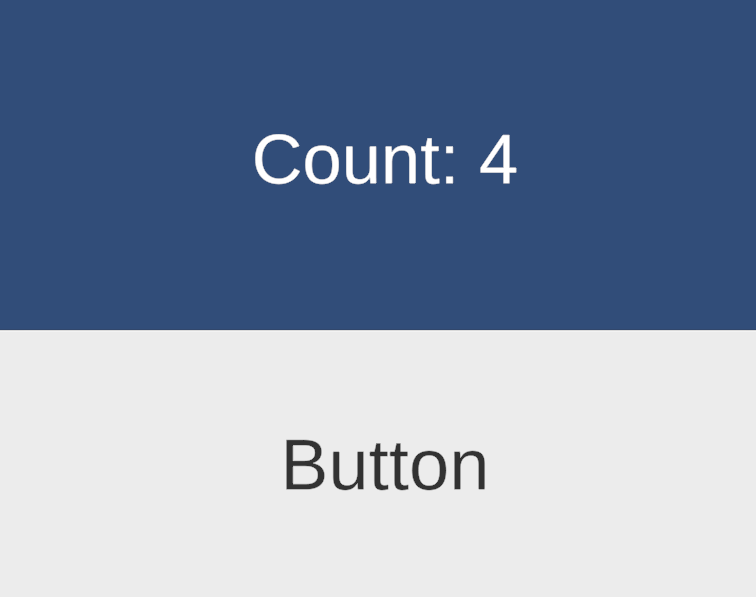
If you run your program and click the button, you should see the count increase! Congrats, you now have a working single source of truth GameState!

Okay but why all the theatrics if we could wire it directly?
Simple, because now if any of your services modifies GameState.Child.Counter, it will also update the counter text without any extra effort.
Let’s do an example with an async void to make a sort of background timer that will also automatically increment the count every 5 seconds, on top of any button clicks you do.
To start, let’s make a new service for this called BackgroundTimerService, and this time we only need to inject the GameState, and this one will also be an IInitializable
We will make a background async method via async void, and simply just have an infinite loop that increments the counter every 5 seconds via Task.Delay(...)
|
|
And register it on our DI Engine (you know the drill by now!)
|
|
And if you run the game now you should see that not only does clicking the button increment our counter, but every 5 seconds it gets incremented by the background service as well!
Now imagine in a way more complex game, where you may have dozens of services all capable of mutating values on the GameState at once, hopefully this sheds some light on how by unifying all your game state down into a single source of truth, it can get a lot easier to maintain all that data flying all over the place at once!
Reference Project
If you are having any issues, please check out the link below for a repo I setup with a working example of the project detailed above. It should theoretically be working fine, and demonstrate everything discussed above. You can compare your project against it to perhaps sus out any issues.
https://repo.technically.fun/sblake/INotifyPropertyChangedExample